Step-By-Step Projects
Recycled Paper Bowl Project
Jennifer Lynch Step-By-Step Projects
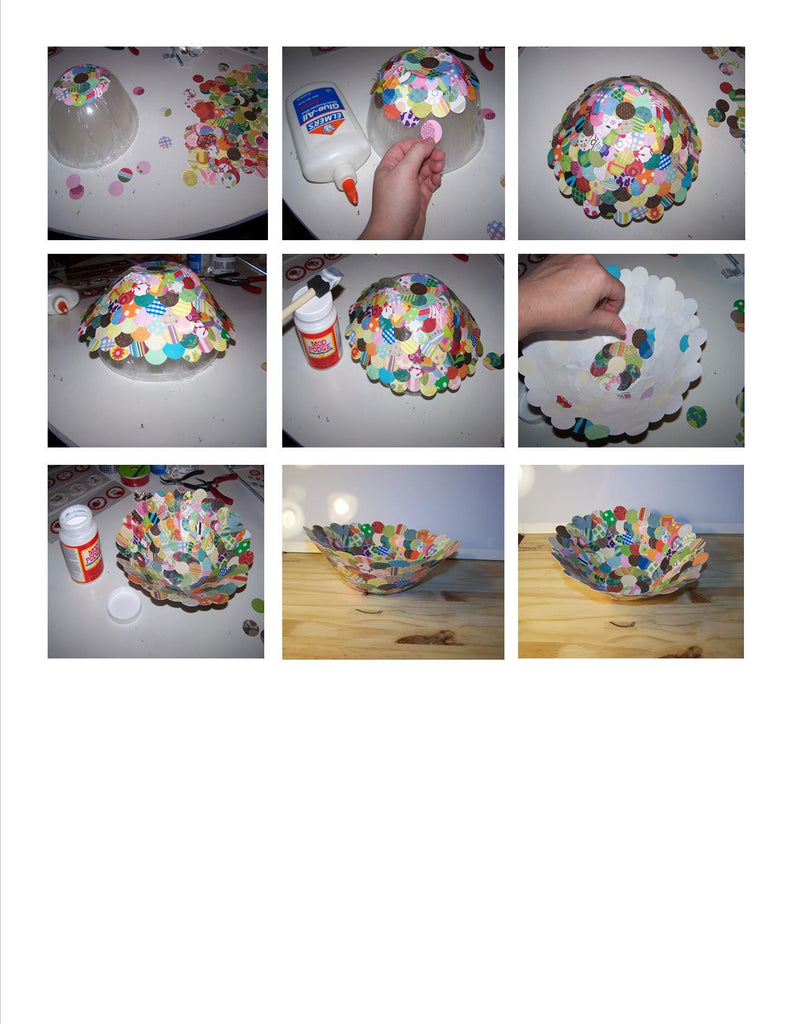
Recycled Paper Bowl Project Keeping with the Recycle, Renew, Reuse/Repurpose theme for this month in celebration of Earth Day, I wanted to show how easy it is to use up some of that extra scrap paper, wrapping paper, etc. that everyone seems to have just laying around the workspace. 1. Cover a bowl (whatever size you choose) with plastic wrap to protect it from the glue. Punch out circles of different paper, I used a 1" circle punch & went to town as you can see by the stack of circles in the pictures. I used all kinds of paper...
Home Recycling Station
Jennifer Lynch Step-By-Step Projects

When I was in grade school (it's was a looonnnggg time ago), I remember us studying Earth Day. We learned this little rhyme "Reduce, Reuse, Recycle Too - It's Up To You and Me!" Well, that stuck with me all these years & I have been an avid recycler ever since. Now it seems the phrase has been updated to Recycle, Renew, Reuse/Repurpose. So, in celebration of Earth Day, which is on Friday April 22, all the posts this month will be dedicated to Recycling and Reusing/Repurposing. This 1st post of the month is how to make a recycling station...
Bunny Nail & String Art
Jennifer Lynch Step-By-Step Projects

Bunny Nail & String Art Yes, you got it, we're bringing it back from the 70's (for those of you who are old enough to remember it from the 1st go-round). So, here we go: 1. Pick your image (I chose a clip art that has 6 identical shapes, in this case bunnies) and prepare your surface (I used a 12" x 12" cork square that I spray painted yellow to go with my theme). 2. Make sure the surface is completely dry before beginning. Lay the image down on the surface, hammer small nails into the outline of the...
How-To Shamrock Painting
Jennifer Lynch Step-By-Step Projects

Step 1 - select image to be used (I printed a shamrock from clip art) and pretreat canvas (if that's what you're using - you can also use a fabric such as a t-shirt) Step 2 - once canvas has dried (I did 2 coats of white to make sure the canvas was completely covered), place cutout image where you want it to be on the canvas (I used tape on the back of my image to keep it in place) Step 3 - select paint (I used 2 colors of green, but you can customize it to the image...